SecTalks Brisbane recently hosted a CTF, and lxb’s Crypto challenge particularly tickled me.
The challenge
Encrypted 4
800 points

Decrypt the following:

'aACgBzD/uBMAzRC/wPi5gAjzqqqBxz4Bc/i0AroBAc0Qvjt8sQC0DrMBigQwyAjAdAfNEIPGAuvx6/4
P+QX5CPkO+RL5APkE+Q75NvkP+Rz5B/lI+RT5aQ' + 'A' * 562 + 'Vao='
You should consider giving it a crack before you read on. I think it’s worth doing.
Foreword
This post got a bit out of hand. It’s largely an unnecessary adventure in reversing and code analysis. For a tl;dr, read “Decoding” then skip to “Home stretch”.
Decoding
Off the bat, two things are obvious:
- It looks incredible Base64-ish. We’ve got alphanum characters,
+,/, and the tell-tale trailing=character/s. - It looks to be a Python-esque construction of a string (ala
"foo" + "bar"*2 + "fuzz")
Asking Python to expand it, we get:
% python -c"print 'aACgBzD/uBMAzRC/wPi5gAjzqqqBxz4Bc/i0AroBAc0Qvjt8sQC0DrMBigQwyAjAdAfNEIPGAuvx6/4P+QX5CPkO+RL5APkE+Q75NvkP+Rz5B/lI+RT5aQ' + 'A' * 562 + 'Vao='" \
  | fold

aACgBzD/uBMAzRC/wPi5gAjzqqqBxz4Bc/i0AroBAc0Qvjt8sQC0DrMBigQwyAjAdAfNEIPGAuvx6/4P
+QX5CPkO+RL5APkE+Q75NvkP+Rz5B/lI+RT5aQAAAAAAAAAAAAAAAAAAAAAAAAAAAAAAAAAAAAAAAAAA
AAAAAAAAAAAAAAAAAAAAAAAAAAAAAAAAAAAAAAAAAAAAAAAAAAAAAAAAAAAAAAAAAAAAAAAAAAAAAAAA
AAAAAAAAAAAAAAAAAAAAAAAAAAAAAAAAAAAAAAAAAAAAAAAAAAAAAAAAAAAAAAAAAAAAAAAAAAAAAAAA
AAAAAAAAAAAAAAAAAAAAAAAAAAAAAAAAAAAAAAAAAAAAAAAAAAAAAAAAAAAAAAAAAAAAAAAAAAAAAAAA
AAAAAAAAAAAAAAAAAAAAAAAAAAAAAAAAAAAAAAAAAAAAAAAAAAAAAAAAAAAAAAAAAAAAAAAAAAAAAAAA
AAAAAAAAAAAAAAAAAAAAAAAAAAAAAAAAAAAAAAAAAAAAAAAAAAAAAAAAAAAAAAAAAAAAAAAAAAAAAAAA
AAAAAAAAAAAAAAAAAAAAAAAAAAAAAAAAAAAAAAAAAAAAAAAAAAAAAAAAAAAAAAAAAAAAAAAAAAAAAAAA
AAAAAAAAAAAAAAAAAAAAAAAAAAAAAAAAAAAAAAAAVao=
Base64 decoding this and redirecting it to a file named encrypted4_decoded:
% python -c"print 'aACgBzD/uBMAzRC/wPi5gAjzqqqBxz4Bc/i0AroBAc0Qvjt8sQC0DrMBigQwyAjAdAfNEIPGAuvx6/4P+QX5CPkO+RL5APkE+Q75NvkP+Rz5B/lI+RT5aQ' + 'A' * 562 + 'Vao='" \
  | base64 -d > encrypted4_decoded
We get a 512B MBR boot sector:
% wc -c encrypted4_decoded
512 encrypted4_decoded

% file encrypted4_decoded
encrypted4_decoded: DOS/MBR boot sector
Main screen turn on
We’re able to boot this MBR boot sector in a VM using qemu’s qemu-system-i386.
Installing the qemu package on Debian is enough to get us qemu-system-i386:
% sudo aptitude install qemu
The following NEW packages will be installed:
ipxe-qemu{a} libbrlapi0.6{a} libcacard0{a} libfdt1{a} libspice-server1{a}
libusbredirparser1{a} libvdeplug2{a} libxen-4.6{a} libxenstore3.0{a}
openbios-ppc{a} openbios-sparc{a} openhackware{a} qemu qemu-slof{a}
qemu-system{a} qemu-system-arm{a} qemu-system-common{a} qemu-system-mips{a}
qemu-system-misc{a} qemu-system-ppc{a} qemu-system-sparc{a}
qemu-system-x86{a} qemu-user{a} qemu-user-binfmt{a} qemu-utils{a}
seabios{a} sharutils{a}
0 packages upgraded, 27 newly installed, 0 to remove and 685 not upgraded.
Need to get 0 B/34.9 MB of archives. After unpacking 243 MB will be used.
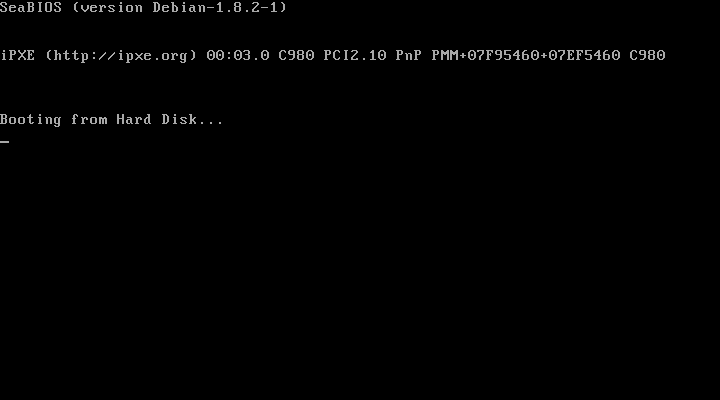
Do you want to continue? [Y/n/?]Starting up the boot sector, we get a cryptic set of characters printed to the VM’s screen:
% qemu-system-i386 encrypted4_decoded

WARNING: Image format was not specified for 'encrypted4_decoded' and probing
         guessed raw. Automatically detecting the format is dangerous for raw
         images, write operations on block 0 will be restricted. Specify the
         'raw' format explicitly to remove the restrictions.
Let’s take a look at what’s going on.
MBR Boot Sectors
The boot sector in question is as follows:
% xxd encrypted4_decoded
00000000: 6800 a007 30ff b813 00cd 10bf c0f8 b980  h...0...........
00000010: 08f3 aaaa 81c7 3e01 73f8 b402 ba01 01cd  ......>.s.......
00000020: 10be 3b7c b100 b40e b301 8a04 30c8 08c0  ..;|........0...
00000030: 7407 cd10 83c6 02eb f1eb fe0f f905 f908  t...............
00000040: f90e f912 f900 f904 f90e f936 f90f f91c  ...........6....
00000050: f907 f948 f914 f969 0000 0000 0000 0000  ...H...i........
00000060: 0000 0000 0000 0000 0000 0000 0000 0000  ................
00000070: 0000 0000 0000 0000 0000 0000 0000 0000  ................
00000080: 0000 0000 0000 0000 0000 0000 0000 0000  ................
00000090: 0000 0000 0000 0000 0000 0000 0000 0000  ................
000000a0: 0000 0000 0000 0000 0000 0000 0000 0000  ................
000000b0: 0000 0000 0000 0000 0000 0000 0000 0000  ................
000000c0: 0000 0000 0000 0000 0000 0000 0000 0000  ................
000000d0: 0000 0000 0000 0000 0000 0000 0000 0000  ................
000000e0: 0000 0000 0000 0000 0000 0000 0000 0000  ................
000000f0: 0000 0000 0000 0000 0000 0000 0000 0000  ................
00000100: 0000 0000 0000 0000 0000 0000 0000 0000  ................
00000110: 0000 0000 0000 0000 0000 0000 0000 0000  ................
00000120: 0000 0000 0000 0000 0000 0000 0000 0000  ................
00000130: 0000 0000 0000 0000 0000 0000 0000 0000  ................
00000140: 0000 0000 0000 0000 0000 0000 0000 0000  ................
00000150: 0000 0000 0000 0000 0000 0000 0000 0000  ................
00000160: 0000 0000 0000 0000 0000 0000 0000 0000  ................
00000170: 0000 0000 0000 0000 0000 0000 0000 0000  ................
00000180: 0000 0000 0000 0000 0000 0000 0000 0000  ................
00000190: 0000 0000 0000 0000 0000 0000 0000 0000  ................
000001a0: 0000 0000 0000 0000 0000 0000 0000 0000  ................
000001b0: 0000 0000 0000 0000 0000 0000 0000 0000  ................
000001c0: 0000 0000 0000 0000 0000 0000 0000 0000  ................
000001d0: 0000 0000 0000 0000 0000 0000 0000 0000  ................
000001e0: 0000 0000 0000 0000 0000 0000 0000 0000  ................
000001f0: 0000 0000 0000 0000 0000 0000 0000 55aa  ..............U.
Wikipedia explains that the structure of a classical generic MBR is as follows:
0x000- Bootstrap code area0x1be- Partition table0x1fe- “Boot signature” (\x55\xaa)
This gives some context to what we’re looking at. The data starting at 0x000 of the file is machine code, the partition table starting at 0x1be is all \x00 in our case (so we can ignore it), and the “Boot signature” of \x55\xaa is indeed present at the end of the file.
Wikipedia also explains the BIOS bootstrap procedure to be as follows:
The bootstrap sequence in the BIOS will load the first valid MBR that it finds into the computer’s physical memory at address 0000h:7C00h. The last instruction executed in the BIOS code will be a “jump” to that address, to direct execution to the beginning of the MBR copy.
We can use dd to extract the first 0x1bd bytes of the file (i.e. the part that we know contains machine code) and pipe it to ndisasm to disassemble it.
We give ndisasm the following parameters:
-b16to specify 16-bit mode. i386 systems boot in 16-bit Real Mode and it’s up to software to switch it to Protected Mode-o7c00hto “anchor” the addressing of output to0x7c00. We do this because we know that the BIOS loads the MBR’s bootsector machine code at the memory address0x7c00before executing it - and by anchoringndisasm’s output in this way, the representation of instructions and things like relative JMP’s will match exactly what is happening where during the machine boot process.
% dd if=encrypted4_decoded count=1 bs=$(python -c'print int(0x1bd)') status=none \
  | ndisasm -b16 -o7c00h -

00007C00  6800A0            push word 0xa000
00007C03  07                pop es
00007C04  30FF              xor bh,bh
00007C06  B81300            mov ax,0x13
00007C09  CD10              int 0x10
00007C0B  BFC0F8            mov di,0xf8c0
00007C0E  B98008            mov cx,0x880
00007C11  F3AA              rep stosb
00007C13  AA                stosb
00007C14  81C73E01          add di,0x13e
00007C18  73F8              jnc 0x7c12
00007C1A  B402              mov ah,0x2
00007C1C  BA0101            mov dx,0x101
00007C1F  CD10              int 0x10
00007C21  BE3B7C            mov si,0x7c3b
00007C24  B100              mov cl,0x0
00007C26  B40E              mov ah,0xe
00007C28  B301              mov bl,0x1
00007C2A  8A04              mov al,[si]
00007C2C  30C8              xor al,cl
00007C2E  08C0              or al,al
00007C30  7407              jz 0x7c39
00007C32  CD10              int 0x10
00007C34  83C602            add si,byte +0x2
00007C37  EBF1              jmp short 0x7c2a
00007C39  EBFE              jmp short 0x7c39
00007C3B  0FF905            psubw mm0,[di]
00007C3E  F9                stc
00007C3F  08F9              or cl,bh
00007C41  0E                push cs
00007C42  F9                stc
00007C43  12F9              adc bh,cl
00007C45  00F9              add cl,bh
00007C47  04F9              add al,0xf9
00007C49  0E                push cs
00007C4A  F9                stc
00007C4B  36F9              ss stc
00007C4D  0FF91C            psubw mm3,[si]
00007C50  F9                stc
00007C51  07                pop es
00007C52  F9                stc
00007C53  48                dec ax
00007C54  F9                stc
00007C55  14F9              adc al,0xf9
00007C57  69000000          imul ax,[bx+si],word 0x0
00007C5B  0000              add [bx+si],al
00007C5D  0000              add [bx+si],al
[... a bunch of disassembly of \x00\x00 omitted for brevity ...]
00007DB9  0000              add [bx+si],al
00007DBB  0000              add [bx+si],al
Old Computer Junk has a post on Debugging an x86 bootloader using QEMU+KVM. This gives us the opportunity to check out what’s going on in a dynamic fashion.
Starting our image with the options -S and -s does the following (according to man qemu-system-i386):
       -S  Do not start CPU at startup (you must type 'c' in the monitor).

       -s  Shorthand for -gdb tcp::1234, i.e. open a gdbserver on TCP port 1234.
Giving this a go:
% qemu-system-i386 -s -S encrypted4_decoded
WARNING: Image format was not specified for 'encrypted4_decoded' and probing
         guessed raw. Automatically detecting the format is dangerous for raw
         images, write operations on block 0 will be restricted. Specify the
         'raw' format explicitly to remove the restrictions.
We see the machine starts in a rather stopped state:

Let’s fire up gdb (note that I have PEDA poked in to my gdb, but it’s not needed for this challenge):
% gdb
GNU gdb (Debian 7.10-1+b1) 7.10
Copyright (C) 2015 Free Software Foundation, Inc.
License GPLv3+: GNU GPL version 3 or later <http://gnu.org/licenses/gpl.html>
This is free software: you are free to change and redistribute it.
There is NO WARRANTY, to the extent permitted by law.  Type "show copying"
and "show warranty" for details.
This GDB was configured as "x86_64-linux-gnu".
Type "show configuration" for configuration details.
For bug reporting instructions, please see:
<http://www.gnu.org/software/gdb/bugs/>.
Find the GDB manual and other documentation resources online at:
<http://www.gnu.org/software/gdb/documentation/>.
For help, type "help".
Type "apropos word" to search for commands related to "word".
gdb-peda$
Connect to the gdb server that qemu provides:
gdb-peda$ target remote localhost:1234
Remote debugging using localhost:1234
Warning: not running or target is remote
0x0000fff0 in ?? ()
Set a few things up as per the Old Computer Junk blog post:
gdb-peda$ set architecture i8086
warning: A handler for the OS ABI "GNU/Linux" is not built into this configuration
of GDB.  Attempting to continue with the default i8086 settings.

The target architecture is assumed to be i8086

gdb-peda$ display /i ($cs*16)+$pc
1: x/i ($cs*16)+$pc
   0xffff0:     jmp    0xf000:0xe05b
And let’s tell execution to continue until our MBR code that the BIOS places at 0x7c00:
gdb-peda$ u *0x7c00
Warning: not running or target is remote
0x00007c00 in ?? ()
1: x/i ($cs*16)+$pc
=> 0x7c00:      push   0xa000
gdb-peda$
We’re now at the first instruction from the above disassembly of the MBR. We can see some activity has occurred in the qemu machine:
ES = 0xa000, BH = 0x00
The first chunk of MBR code does the following:
00007C00  6800A0            push word 0xa000
00007C03  07                pop es
This has the effect of setting the ES register to 0xa000 and zeroing out the high byte (more on low/high bytes of 16-bit registers in a second) of BX (anything XOR’d with itself == 0). We have some string write operations coming up, and ES is used as a segment address; a base address from which these string writes are offset (more on these soon).
Allowing execution to continue through this chunk until the next instruction (at 0x7c06) we see that not a lot happens visibly to the qemu machine:
gdb-peda$ u *0x7c06
Warning: not running or target is remote
0x00007c06 in ?? ()
1: x/i ($cs*16)+$pc
=> 0x7c06:      mov    ax,0x13
Lucky mode 0x13
The next chunk of code is as follows:
00007C06  B81300            mov ax,0x13
00007C09  CD10              int 0x10
This sets the AX register to 0x0013 then performs an INT 0x10. Wikipedia explains that INT 0x10 is a BIOS interrupt call that handles video services.
A quick side-note - the 16-bit AX register is able to have its two halves accessed independently. AL corresponds to its low byte, and AH corresponds to its high byte. In the case of AX == 0x0013 we have AH == 0x00 and AL == 0x13
Wikipedia tells us that INT 0x10 when AH == 0x00 performs the “Set video mode” function, and the mode that is activated is specified by the value of AL. Mode 0x13 is a 256-colour mode of 320x200 pixels. David Brackeen has written some great info on this mode. Notably, he mentions that the state of the pixels on-screen is governed by the contents of memory at segment 0xA000. Recall that ES was set to 0xa000 and that this is where we’re about to see some string operations write to!
Allowing execution to continue until the instruction following this chunk (at 0x7c0b) we see a change in our qemu machine - the screen is blanked out.
gdb-peda$ u *0x7c0b
Warning: not running or target is remote
0x00007c0b in ?? ()
1: x/i ($cs*16)+$pc
=> 0x7c0b:      mov    di,0xf8c0
Border patrol
The next chunk of code reads as follows:
00007C0B  BFC0F8            mov di,0xf8c0
00007C0E  B98008            mov cx,0x880
00007C11  F3AA              rep stosb
00007C13  AA                stosb
The meat of this is in the REP STOSB. Breaking it down:
STOSBdoes the following:- Stores the contents of the
ALregister at offsetDIin segmentES(remember,ESwas set to0xa000) - i.e.MOV ES:[DI],AL - If
DF(direction flag) is0then incrementDIby one, ready for a write to the next greater destination - Else
DFmust be1, and so decrementDIby one, ready for a write to the next lesser destination
- Stores the contents of the
REPmeans to do the thing (in this caseSTOSB) the number of times given by the registerCX
In other words, “write CX copies of the byte in AL at DI. Write them going forwards if DF == 0 else write them going backwards.”
DF is currently not set:
gdb-peda$ print $ps
$4 = [ PF ZF IF ]
And the contents of AL is currently 0x20 (it must have been populated during the previous INT 0x10 operation)
gdb-peda$ print $ax
$5 = 0x20
And so REP STOSB is going to write the value 0x20 to 0x880 consecutive memory locations starting at 0xa000:0xfc80 and then once more by the lonely STOSB for good measure.
Recall that 256-color graphics mode 0x13 has its on-screen pixels specified by the contents of memory in segment 0xa000.
Allowing execution to continue until the next instruction at 0x7c14, we see some lovely blue lines drawn at the top and bottom of the screen.
gdb-peda$ u *0x7c14
Warning: not running or target is remote
0x00007c14 in ?? ()
1: x/i ($cs*16)+$pc
=> 0x7c14:      add    di,0x13e
Writing bytes to these particular memory locations seems to directly drive the pixels at the top and bottom of the screen. Neat!
The next chunk of code is:
00007C14  81C73E01          add di,0x13e
00007C18  73F8              jnc 0x7c12
The value of DI is currently 0x0141:
gdb-peda$ print $di
$1 = 0x141
Adding 0x13e to DI will result in DI == 0x27f. This does not overflow the 16-bit register, and so the Carry flag will not be set and the JNC (Jump if No Carry) jump back to 0x7c12 will be taken. Interestingly, an instruction at 0x7c12 doesn’t appear in our disassembly - we’ve only seen instructions at 0x7c11 and 0x7c13.
This demonstrates a phemonena on CISC architectures with variable size instructions. It is completely legal to start reading instructions from the “middle” of another instruction (if there is such a thing) and to give no cares about alignment or the “start” and “end” of instructions. A stream of instructions, represented as bytes, can “start” being read from one of many “starting points”, and the resulting instructions can differ greatly depending on from where one starts reading.
Recall that ndisasm’s natural disassembly looks like the following:
00007C11  F3AA              rep stosb
00007C13  AA                stosb
00007C14  81C73E01          add di,0x13e
00007C18  73F8              jnc 0x7c12
The target of the JNC jump is 0x7c12 which is smack bang in the middle of the REP STOSB instruction. This jump takes us to \xaa which we already see assembles to STOSB. Asking gdb to examine memory as instructions from 0x7c12 confirms this:
gdb-peda$ x/5i 0x7c12
   0x7c12:      stos   BYTE PTR es:[di],al
   0x7c13:      stos   BYTE PTR es:[di],al
=> 0x7c14:      add    di,0x13e
   0x7c18:      jae    0x7c12
   0x7c1a:      mov    ah,0x2
Note that JNC (Jump if No Carry) and JAE (Jump if Above or Equal) are synonymous, as is STOSB and STOS BYTE PTR es:[di],al and different disassemblers are free to choose one representation or the other ¯\_(ツ)_/¯
And so looks like this jump takes us to some more STOS‘ing to the pixel-driving 0xa000 segment, adding to DI, and repeating until the DI register overflows. Allowing execution to continue until after the JAE gives us left and right borders.
gdb-peda$ u *0x7c1a
Warning: not running or target is remote
0x00007c1a in ?? ()
1: x/i ($cs*16)+$pc
=> 0x7c1a:      mov    ah,0x2
Home stretch
The next chunk of code reads as follows:
00007C1A  B402              mov ah,0x2
00007C1C  BA0101            mov dx,0x101
00007C1F  CD10              int 0x10
Recall that INT 0x10 relates to video services. Wikipedia tells us that when AH == 0x02 we’re setting the cursor position, with BH giving us the “page number” and DH/DL giving us the row/column respectively.
BH is currently 0x00:
gdb-peda$ print $bh
$2 = 0x0
We can see that DH/DL are being set to 0x01/0x01. This is probably getting the cursor positioned for printing some text.
Allowing execution to continue until the next instruction at 0x7C21:
gdb-peda$ u *0x7c21
Warning: not running or target is remote
0x00007c21 in ?? ()
1: x/i ($cs*16)+$pc
=> 0x7c21:      mov    si,0x7c3b
We see that nothing on the screen of our machine changes, and we’re on to the next code chunk:
00007C21  BE3B7C            mov si,0x7c3b
00007C24  B100              mov cl,0x0
00007C26  B40E              mov ah,0xe
00007C28  B301              mov bl,0x1
00007C2A  8A04              mov al,[si]
00007C2C  30C8              xor al,cl
00007C2E  08C0              or al,al
00007C30  7407              jz 0x7c39
00007C32  CD10              int 0x10
00007C34  83C602            add si,byte +0x2
00007C37  EBF1              jmp short 0x7c2a
00007C39  EBFE              jmp short 0x7c39
Things look to be getting serious. The JZ (Jump if Zero) at 0x7c30 is taken if the OR AL,AL preceding it results in the Zero flag being set (i.e. if AL == 0x00). Keeping that in mind, let’s annotate all the jumps real quick:
     00007C21  BE3B7C                         mov si,0x7c3b
     00007C24  B100                           mov cl,0x0
     00007C26  B40E                           mov ah,0xe
     00007C28  B301                           mov bl,0x1
|--> 00007C2A  8A04                           mov al,[si]
|    00007C2C  30C8                           xor al,cl
|    00007C2E  08C0                           or al,al
|    00007C30  7407                           jz 0x7c39  ----- if AL==0  -----
|    00007C32  CD10                           int 0x10                       |
|    00007C34  83C602                         add si,byte +0x2               |
|--- 00007C37  EBF1                           jmp short 0x7c2a               |
     00007C39  EBFE  <-- infinite loop -->    jmp short 0x7c39 <--------------
That’s better. We can see that we’re doing some setup, then looping through something until AL after an XOR == 0x00 at which time our machine gets trapped in an infinite loop. This must be the home stretch. Let’s dive in!
At 0x7c21 through 0x7c28 we do some setup:
SI=0x7c3bCL=0x00AH=0xe0BL=0x10
At 0x7c2a through 0x7c2c we get the byte at the memory location pointed to by SI and put it in AL then XOR it with the value in CL (which is always going to be 0x00, so this XOR never does anything. Weird.)
At 0x7c2e through 0x7c39 we send ourselves to an infinite loop if AL == 0x00 after the XOR’ing.
At 0x7c32 we see our friend INT 0x10 once more. Wikipedia tells us that INT 0x10 when AH == 0xe0 triggers “Teletype output” with BH (still 0x00) specifying the “Page Number”, BL (0x01) specifying the colour, and AL (having just beein pulled from [SI] and XOR’d with 0x00) specifying the character to print.
At 0x7c34 through 0x7c37 we have SI being incremented by 0x02 and execution returning to 0x7c2a
That is, we load a byte from [SI] to AL, XOR it, JMP to infinite loop if it’s now 0x00, print the character, add 0x02 to SI, and repeat.
Grabbing the bytes from 0x7c3b (the initial value of SI) onwards:
gdb-peda$ x/48b 0x7c3b
0x7c3b: 0x0f    0xf9    0x05    0xf9    0x08    0xf9    0x0e    0xf9
0x7c43: 0x12    0xf9    0x00    0xf9    0x04    0xf9    0x0e    0xf9
0x7c4b: 0x36    0xf9    0x0f    0xf9    0x1c    0xf9    0x07    0xf9
0x7c53: 0x48    0xf9    0x14    0xf9    0x69    0x00    0x00    0x00
0x7c5b: 0x00    0x00    0x00    0x00    0x00    0x00    0x00    0x00
0x7c63: 0x00    0x00    0x00    0x00    0x00    0x00    0x00    0x00
Taking every other byte (remember, SI is incremented by 2 every iteration of the read-XOR-print loop) up to the series of 0x00 bytes at the end gives us \x0f\x05\x08\x0e\x12\x00\x04\x0e\x36\x0f\x1c\x07\x48\x14\x69
Now, we know that each of these bytes are bring XOR’d with 0x00 and the loop is being terminated if the result is 0x00, else it is being printed to screen as a character. There is a null byte in the middle of the string, which when XOR’d with 0x00 causes the loop to terminate. Furthermore, the characters being printed aren’t in the printable ASCII range. Perhaps this is our flag, XOR-encrypted, with the key having been null’d out of the code.
We know that the loop is supposed to terminate at the byte, which when XOR’d with the key, is 0x00. The final byte in this sequence is 0x69, if this is supposed to be the loop-terminating null byte, then our key must be 0x69.
Giving it a go:
% python
Python 2.7.11+ (default, Mar 30 2016, 21:00:42)
[GCC 5.3.1 20160323] on linux2
Type "help", "copyright", "credits" or "license" for more information.
>>> ciphertext = "\x0f\x05\x08\x0e\x12\x00\x04\x0e\x36\x0f\x1c\x07\x48\x14\x69"
>>> print "".join(map(lambda x:chr(ord(x)^0x69), ciphertext))
flag{img_fun!}
>>>
That’s the ticket!
For fun, let’s hot-patch the paused qemu machine with this key.
We know the key is being loaded in to CL at 0x7c24:
gdb-peda$ x/2i 0x7c24
   0x7c24:      mov    cl,0x0
   0x7c26:      mov    ah,0xe
Showing this two-byte instruction as bytes:
gdb-peda$ x/2x 0x7c24
0x7c24: 0xb1    0x00
We see that the key byte is at 0x7c25 in memory. Editing it with set:
gdb-peda$ set *(char *) 0x7c25 = 0x69
gdb-peda$ x/2i 0x7c24
   0x7c24:      mov    cl,0x69
   0x7c26:      mov    ah,0xe
And allowing execution to continue:
gdb-peda$ c
Continuing.
We get our flag printed to screen:

It would also be possible to patch the MBR boot sector file on disk prior to launching it with qemu-system-i386. This is left as an exercise for the reader :)